> ## Documentation Index
> Fetch the complete documentation index at: https://formhug.ai/docs/llms.txt
> Use this file to discover all available pages before exploring further.
# Notion Integration
> Connect Notion to FormHug and automatically create database pages from new form submissions
The **Notion integration** sends new FormHug submissions to an existing Notion database. Each submission becomes a new database page, with selected form fields mapped to Notion properties and optional page content.
Use it when your team already manages leads, requests, feedback, events, or operations inside Notion and you want form responses to appear there automatically.
Create the target database in Notion before you start. FormHug can connect to an existing Notion database and map form fields to its properties, but it does not create a new Notion database for you.
## When to Use Notion
Notion works best when submissions need context, follow-up, and team collaboration after they are collected.
* **Waitlists and early access requests**: send each signup to a Notion database so product, support, or sales teams can review interest, source, and use case in one place.
* **Customer feedback and research**: collect survey responses, feature requests, or interview applications and turn them into searchable Notion records.
* **Event registrations and RSVPs**: keep attendee details, session choices, dietary notes, and internal follow-up status in a Notion event database.
* **Internal request intake**: route content briefs, design requests, bug reports, or operations tasks into a team database instead of manually copying submissions.
* **Lead capture and partner inquiries**: push landing page submissions into a Notion CRM-style database for qualification and assignment.
* **Quiz or assessment follow-up**: store participant details, scores, and notes in Notion so your team can review outcomes and plan next steps.
## Before You Start
Make sure you have:
* A published FormHug form with the fields you want to send to Notion
* A Notion account with access to the target workspace
* A Notion database already created for the submissions
* Database properties that match the type of data you want to store, such as title, text, email, phone, select, multi-select, date, number, URL, or checkbox fields
* Permission to share the database with external connections
In Notion, databases are made of pages. FormHug creates a new page inside the database you select, then fills the mapped properties and page content.
## Connect Notion
Open the form you want to connect, then go to **Settings -> Integrations**.
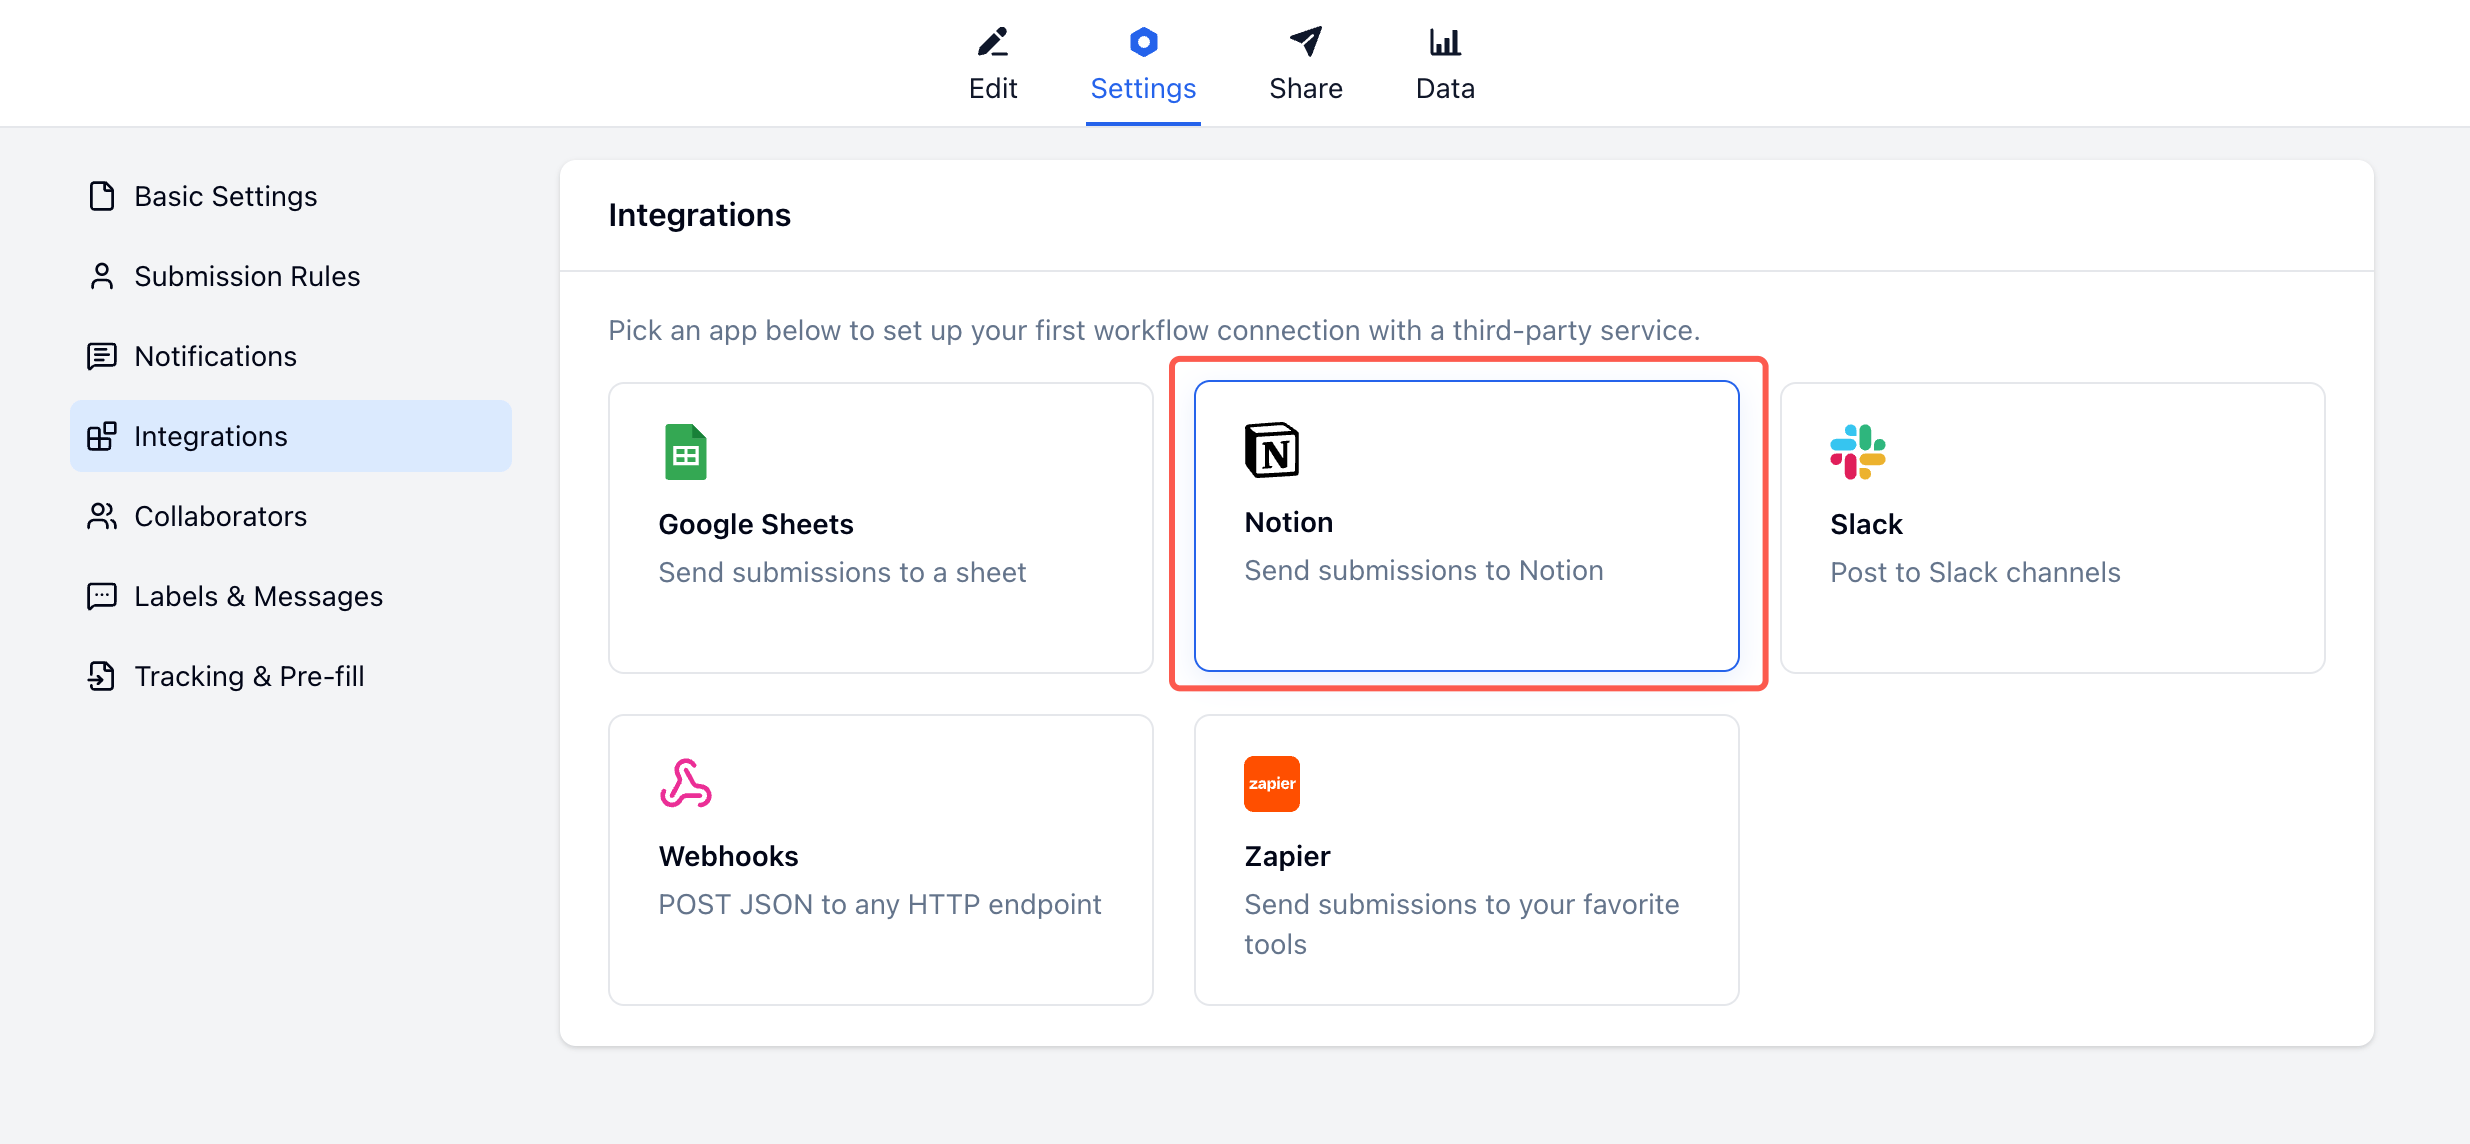 In **Integrations**, choose **Notion**.
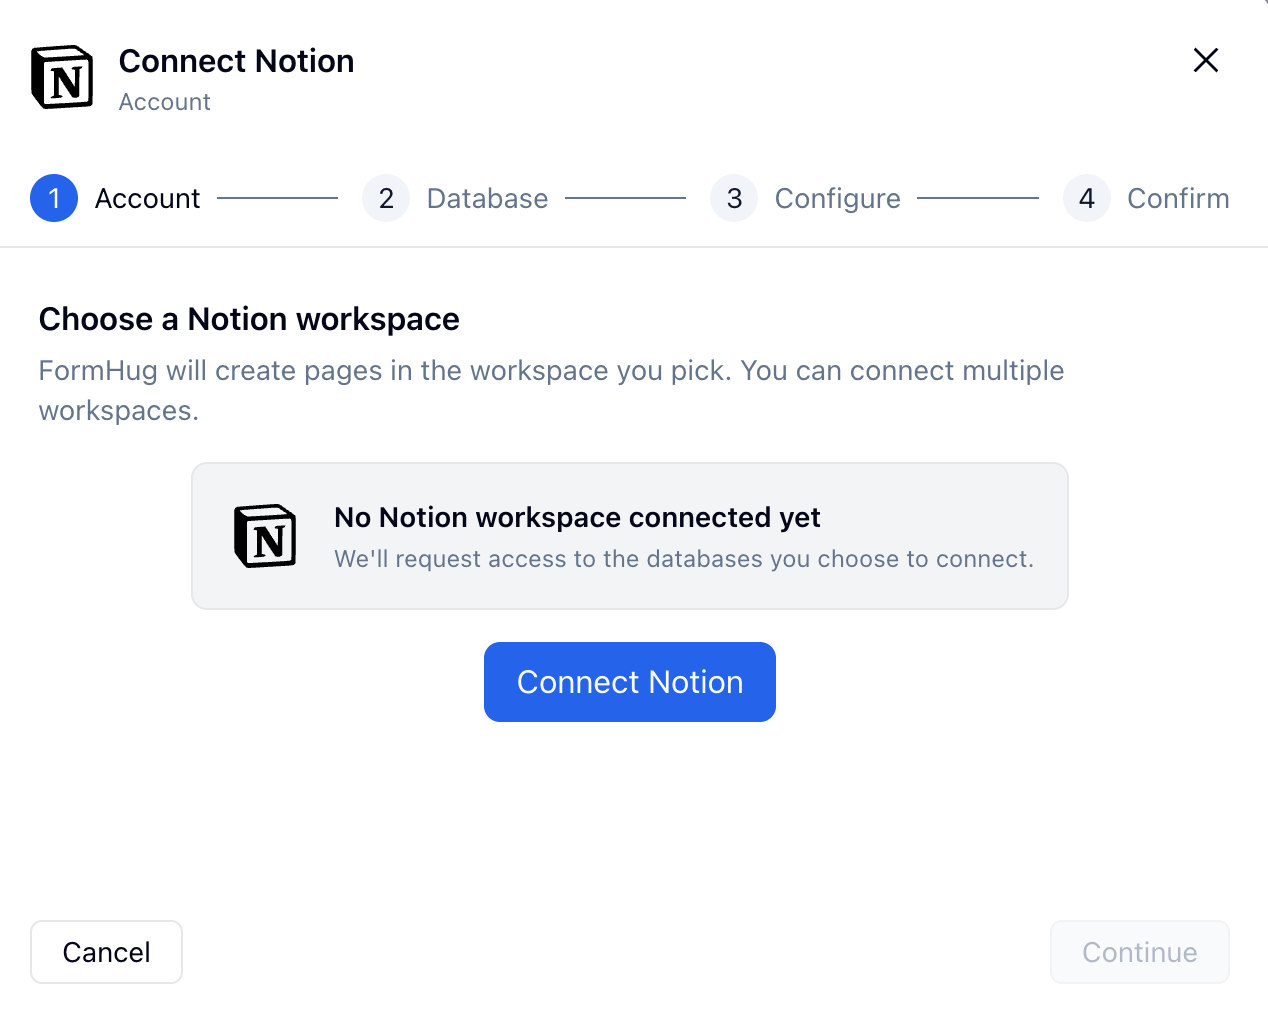
Click **Connect Notion** to start the authorization flow.
In **Integrations**, choose **Notion**.
Click **Connect Notion** to start the authorization flow.
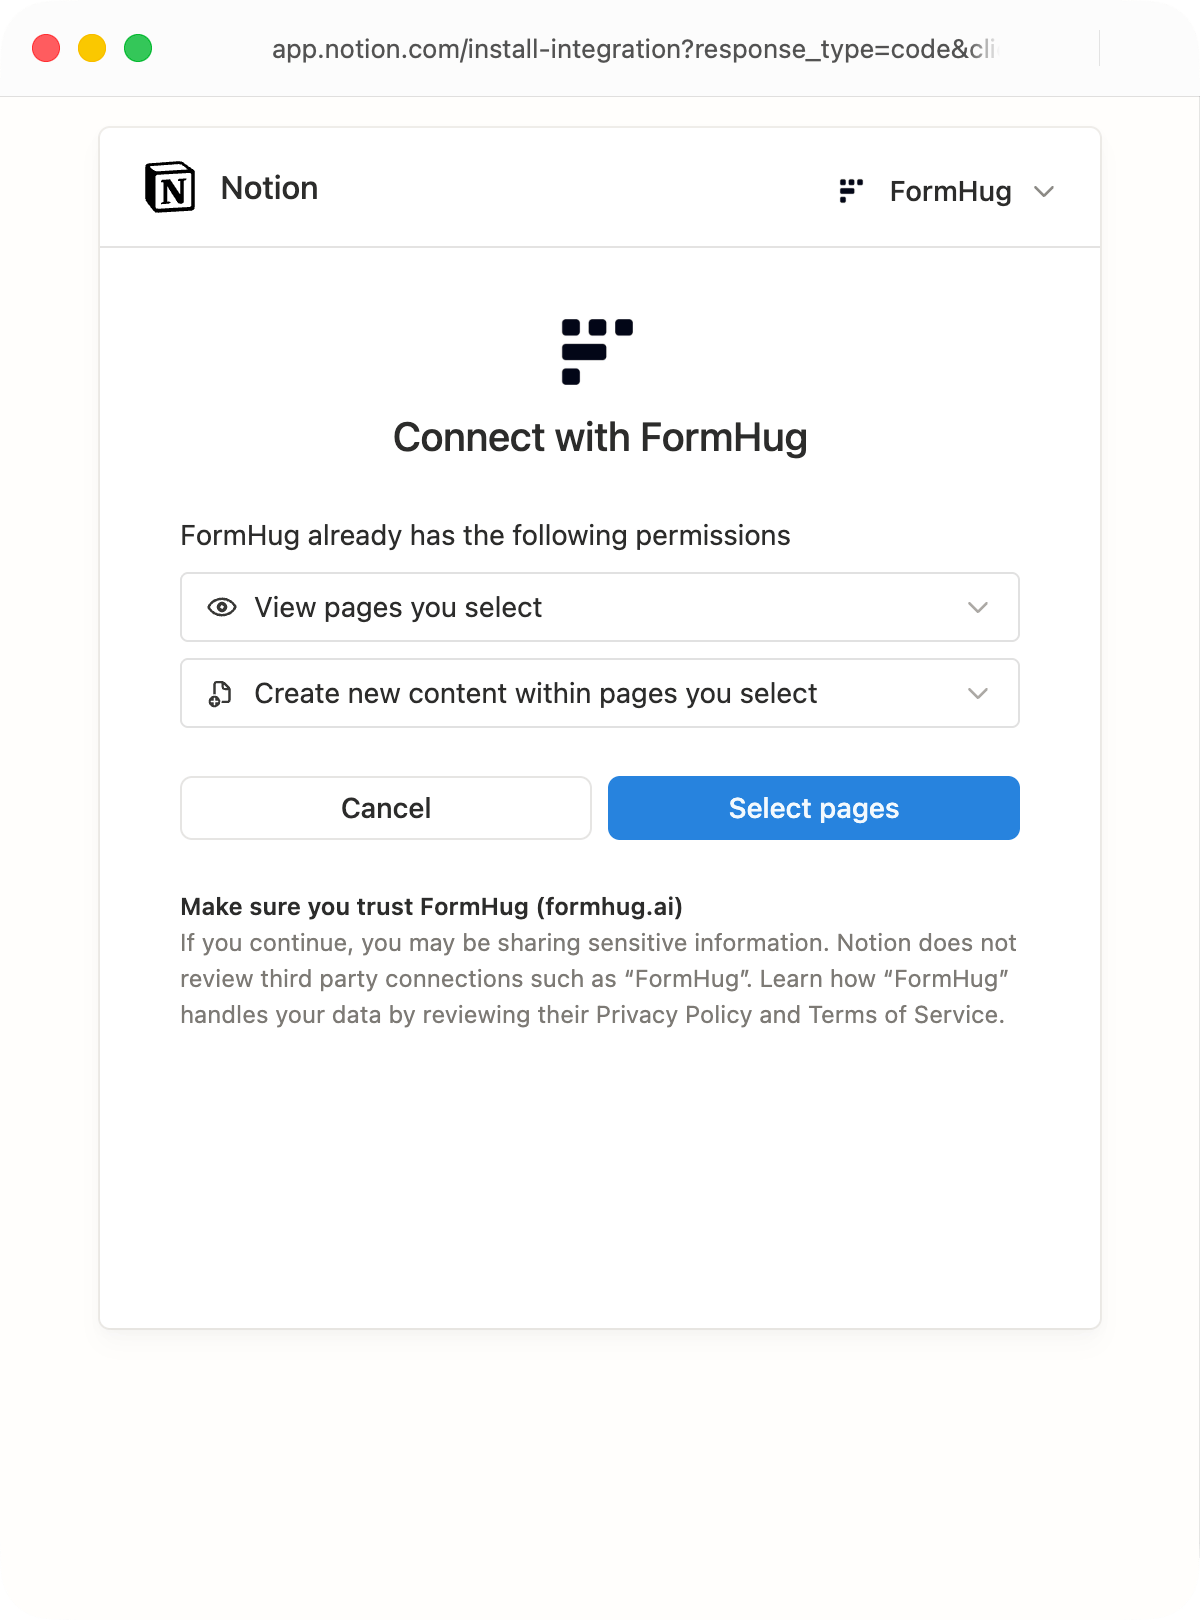
 Notion opens a permission screen for the FormHug connection. Click **Select pages**.
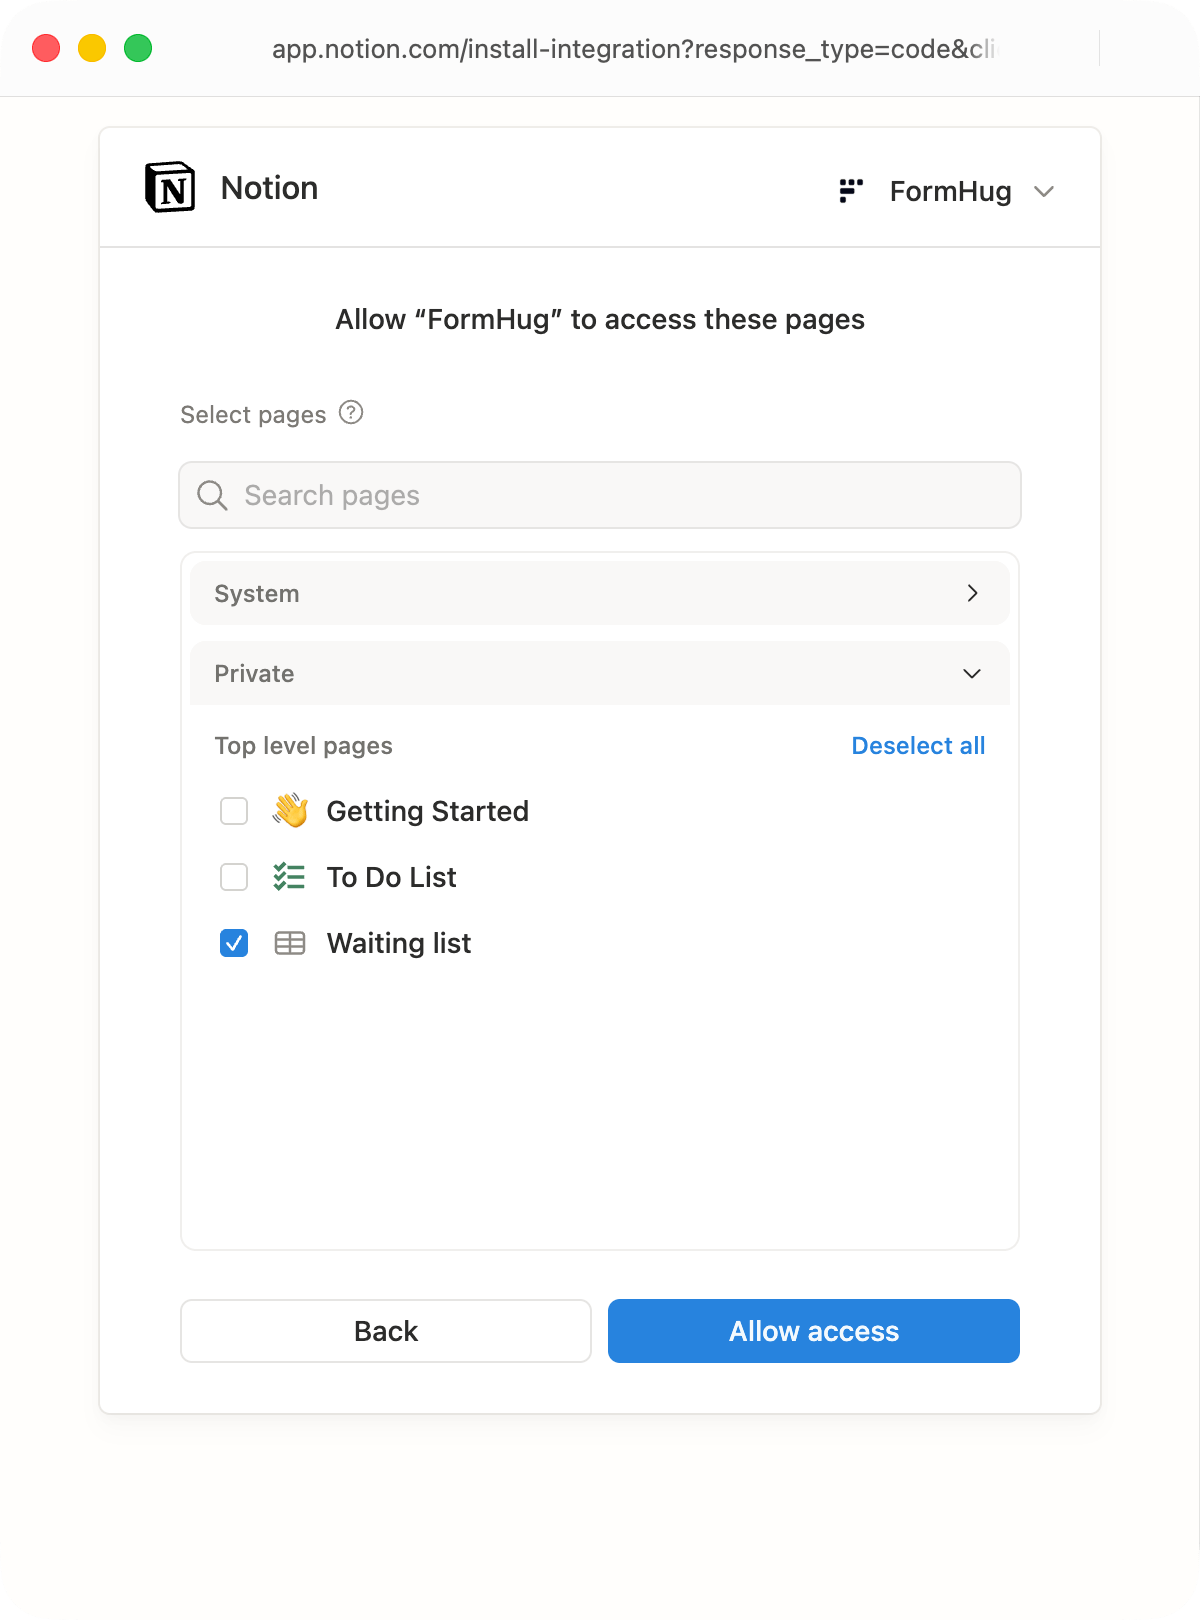
 Select the Notion page or database that contains the database you want FormHug to write to, then click **Allow access**.
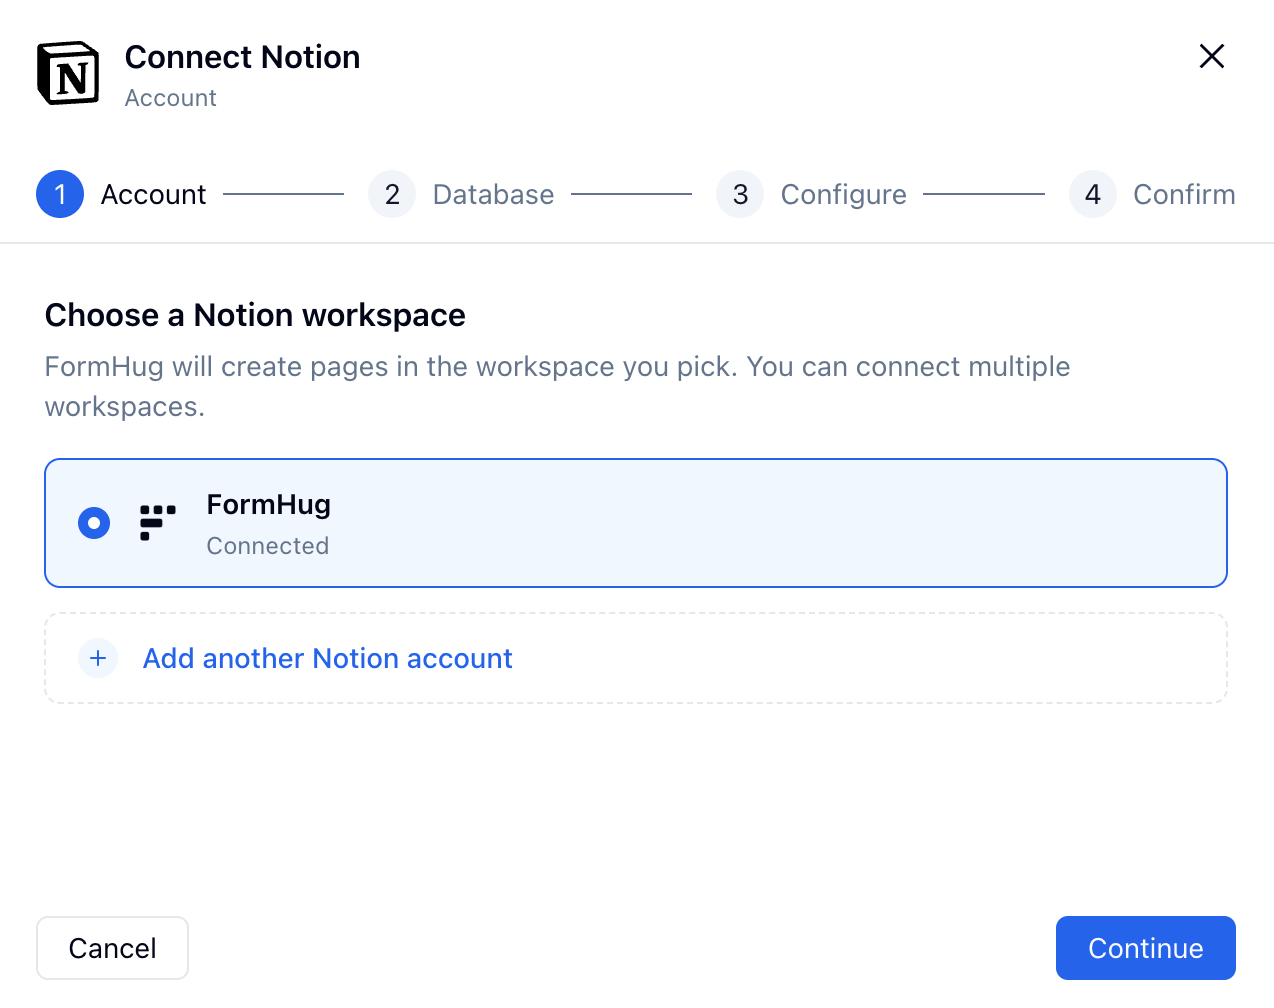
 After authorization, select the connected Notion workspace in FormHug and click **Continue**.
 Notion only shows pages and databases that your Notion user can share with a connection. If you cannot find the database, check that you have full access in Notion, then use **Re-authorize to add more pages** from FormHug.
## Select a Database
Choose the Notion database that should receive submissions, then click **Continue**.
Notion only shows pages and databases that your Notion user can share with a connection. If you cannot find the database, check that you have full access in Notion, then use **Re-authorize to add more pages** from FormHug.
## Select a Database
Choose the Notion database that should receive submissions, then click **Continue**.
 If your database is missing, it usually means FormHug was not granted access to it during the Notion authorization step. Re-authorize the connection and select the database or a parent page that contains it.
## Configure the Page and Field Mapping
On the configure step, decide how each new Notion database page should be created.
If your database is missing, it usually means FormHug was not granted access to it during the Notion authorization step. Re-authorize the connection and select the database or a parent page that contains it.
## Configure the Page and Field Mapping
On the configure step, decide how each new Notion database page should be created.
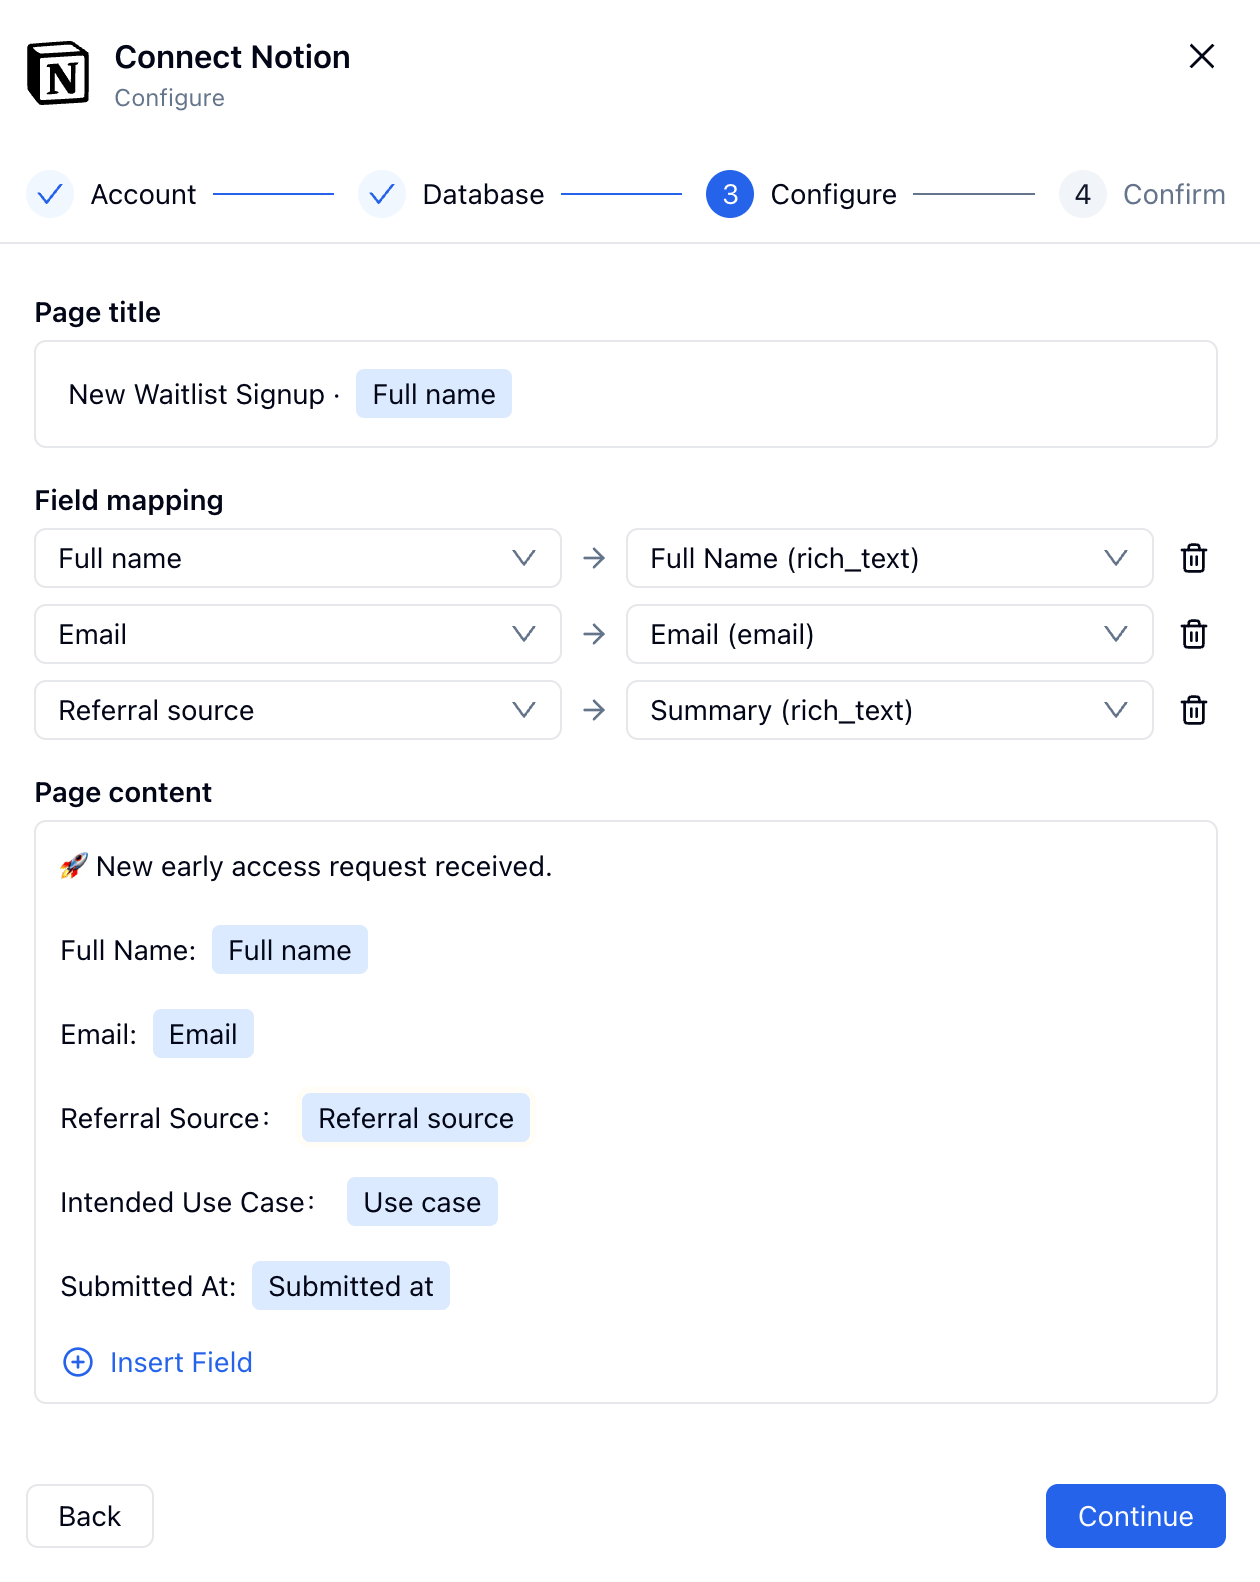 ### Page Title
Set the page title pattern for new Notion pages. You can type static text and insert FormHug fields.
For example:
```text theme={null}
New Waitlist Signup - Full name
```
This makes new records easy to scan in Notion.
### Field Mapping
Map FormHug fields to compatible Notion database properties. For example:
| FormHug field | Notion property |
| --------------- | --------------- |
| Full name | Full Name |
| Email | Email |
| Referral source | Summary |
Only map fields that belong in structured Notion properties. Use page content for longer notes, descriptions, and submission details that do not need to be filtered or sorted as database properties.
### Page Content
Use **Page content** to build the body of the Notion page. You can add labels, paragraphs, and inserted FormHug fields so teammates have the full submission context when they open the page.
This is useful for long text fields, multi-question answers, comments, or internal review context.
## Review and Create the Connection
Review the workspace, database, page title, and mapped fields. If everything looks right, click **Create and connect**.
### Page Title
Set the page title pattern for new Notion pages. You can type static text and insert FormHug fields.
For example:
```text theme={null}
New Waitlist Signup - Full name
```
This makes new records easy to scan in Notion.
### Field Mapping
Map FormHug fields to compatible Notion database properties. For example:
| FormHug field | Notion property |
| --------------- | --------------- |
| Full name | Full Name |
| Email | Email |
| Referral source | Summary |
Only map fields that belong in structured Notion properties. Use page content for longer notes, descriptions, and submission details that do not need to be filtered or sorted as database properties.
### Page Content
Use **Page content** to build the body of the Notion page. You can add labels, paragraphs, and inserted FormHug fields so teammates have the full submission context when they open the page.
This is useful for long text fields, multi-question answers, comments, or internal review context.
## Review and Create the Connection
Review the workspace, database, page title, and mapped fields. If everything looks right, click **Create and connect**.
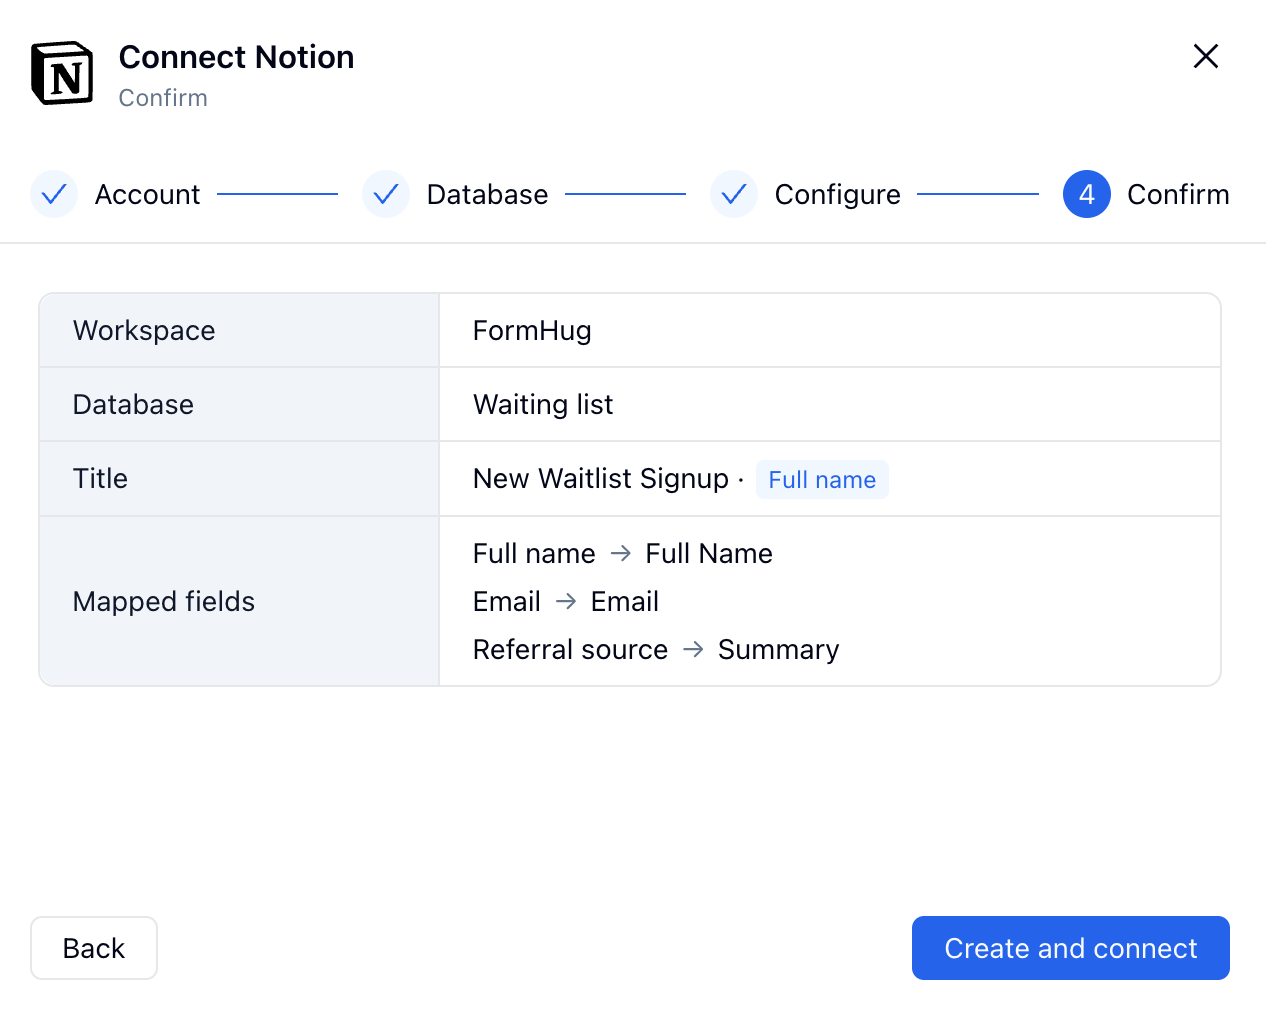 FormHug starts sending new submissions to the selected Notion database after the connection is created.
## Manage the Notion Connection
After setup, the Notion connection appears in **My connections** on the Integrations page.
FormHug starts sending new submissions to the selected Notion database after the connection is created.
## Manage the Notion Connection
After setup, the Notion connection appears in **My connections** on the Integrations page.
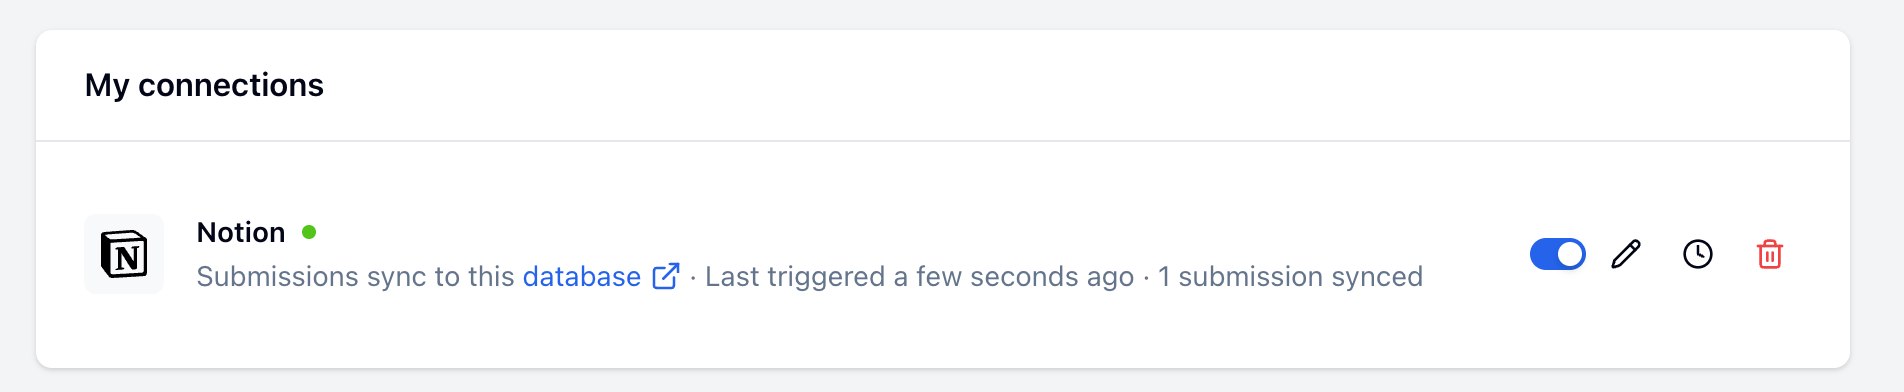 From this page you can:
| Action | How |
| ------------------------ | ----------------------- |
| Enable or disable sync | Toggle the switch |
| Edit the connection | Click the pencil icon |
| View event logs | Click the clock icon |
| Delete the connection | Click the trash icon |
| Open the target database | Click the database link |
## Check Event Logs
Use the event log to confirm whether submissions synced successfully or to investigate failed sync attempts.
From this page you can:
| Action | How |
| ------------------------ | ----------------------- |
| Enable or disable sync | Toggle the switch |
| Edit the connection | Click the pencil icon |
| View event logs | Click the clock icon |
| Delete the connection | Click the trash icon |
| Open the target database | Click the database link |
## Check Event Logs
Use the event log to confirm whether submissions synced successfully or to investigate failed sync attempts.
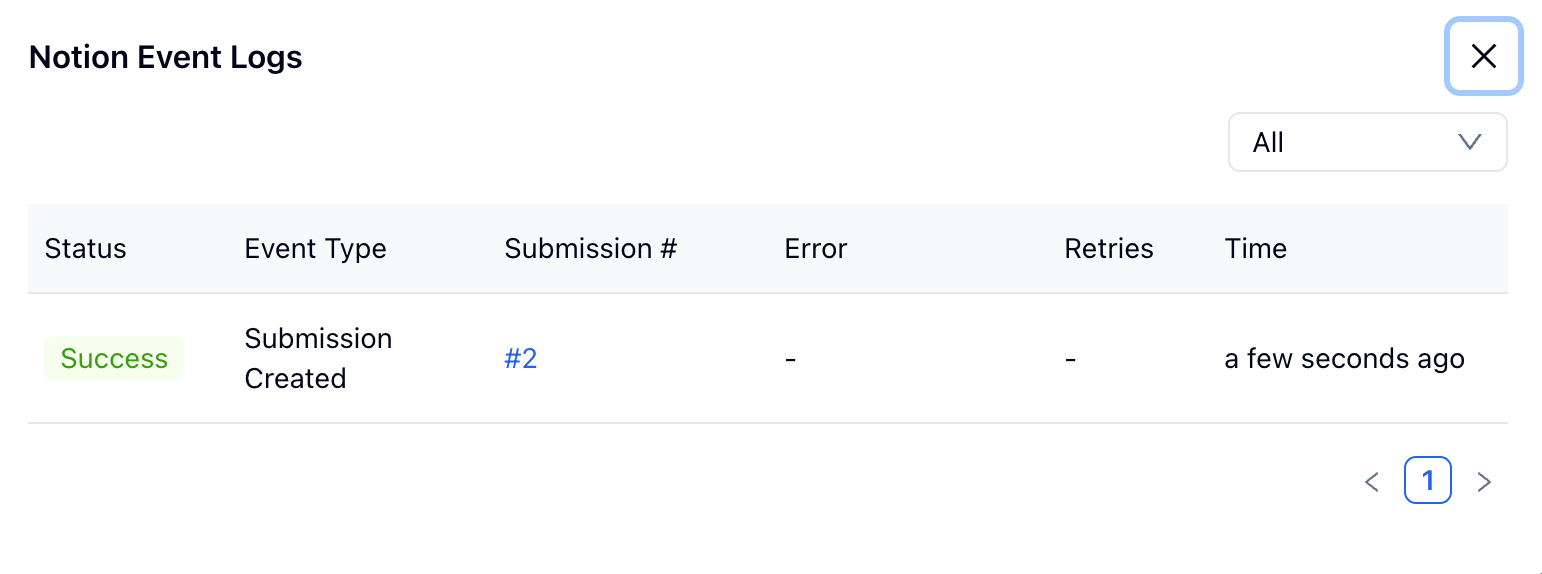 Each log includes the status, event type, submission number, error message if any, retry count, and time.
## Check the Synced Notion Page
Submit a test entry after creating the connection. Then open the connected Notion database and confirm that a new page appears.
Each log includes the status, event type, submission number, error message if any, retry count, and time.
## Check the Synced Notion Page
Submit a test entry after creating the connection. Then open the connected Notion database and confirm that a new page appears.
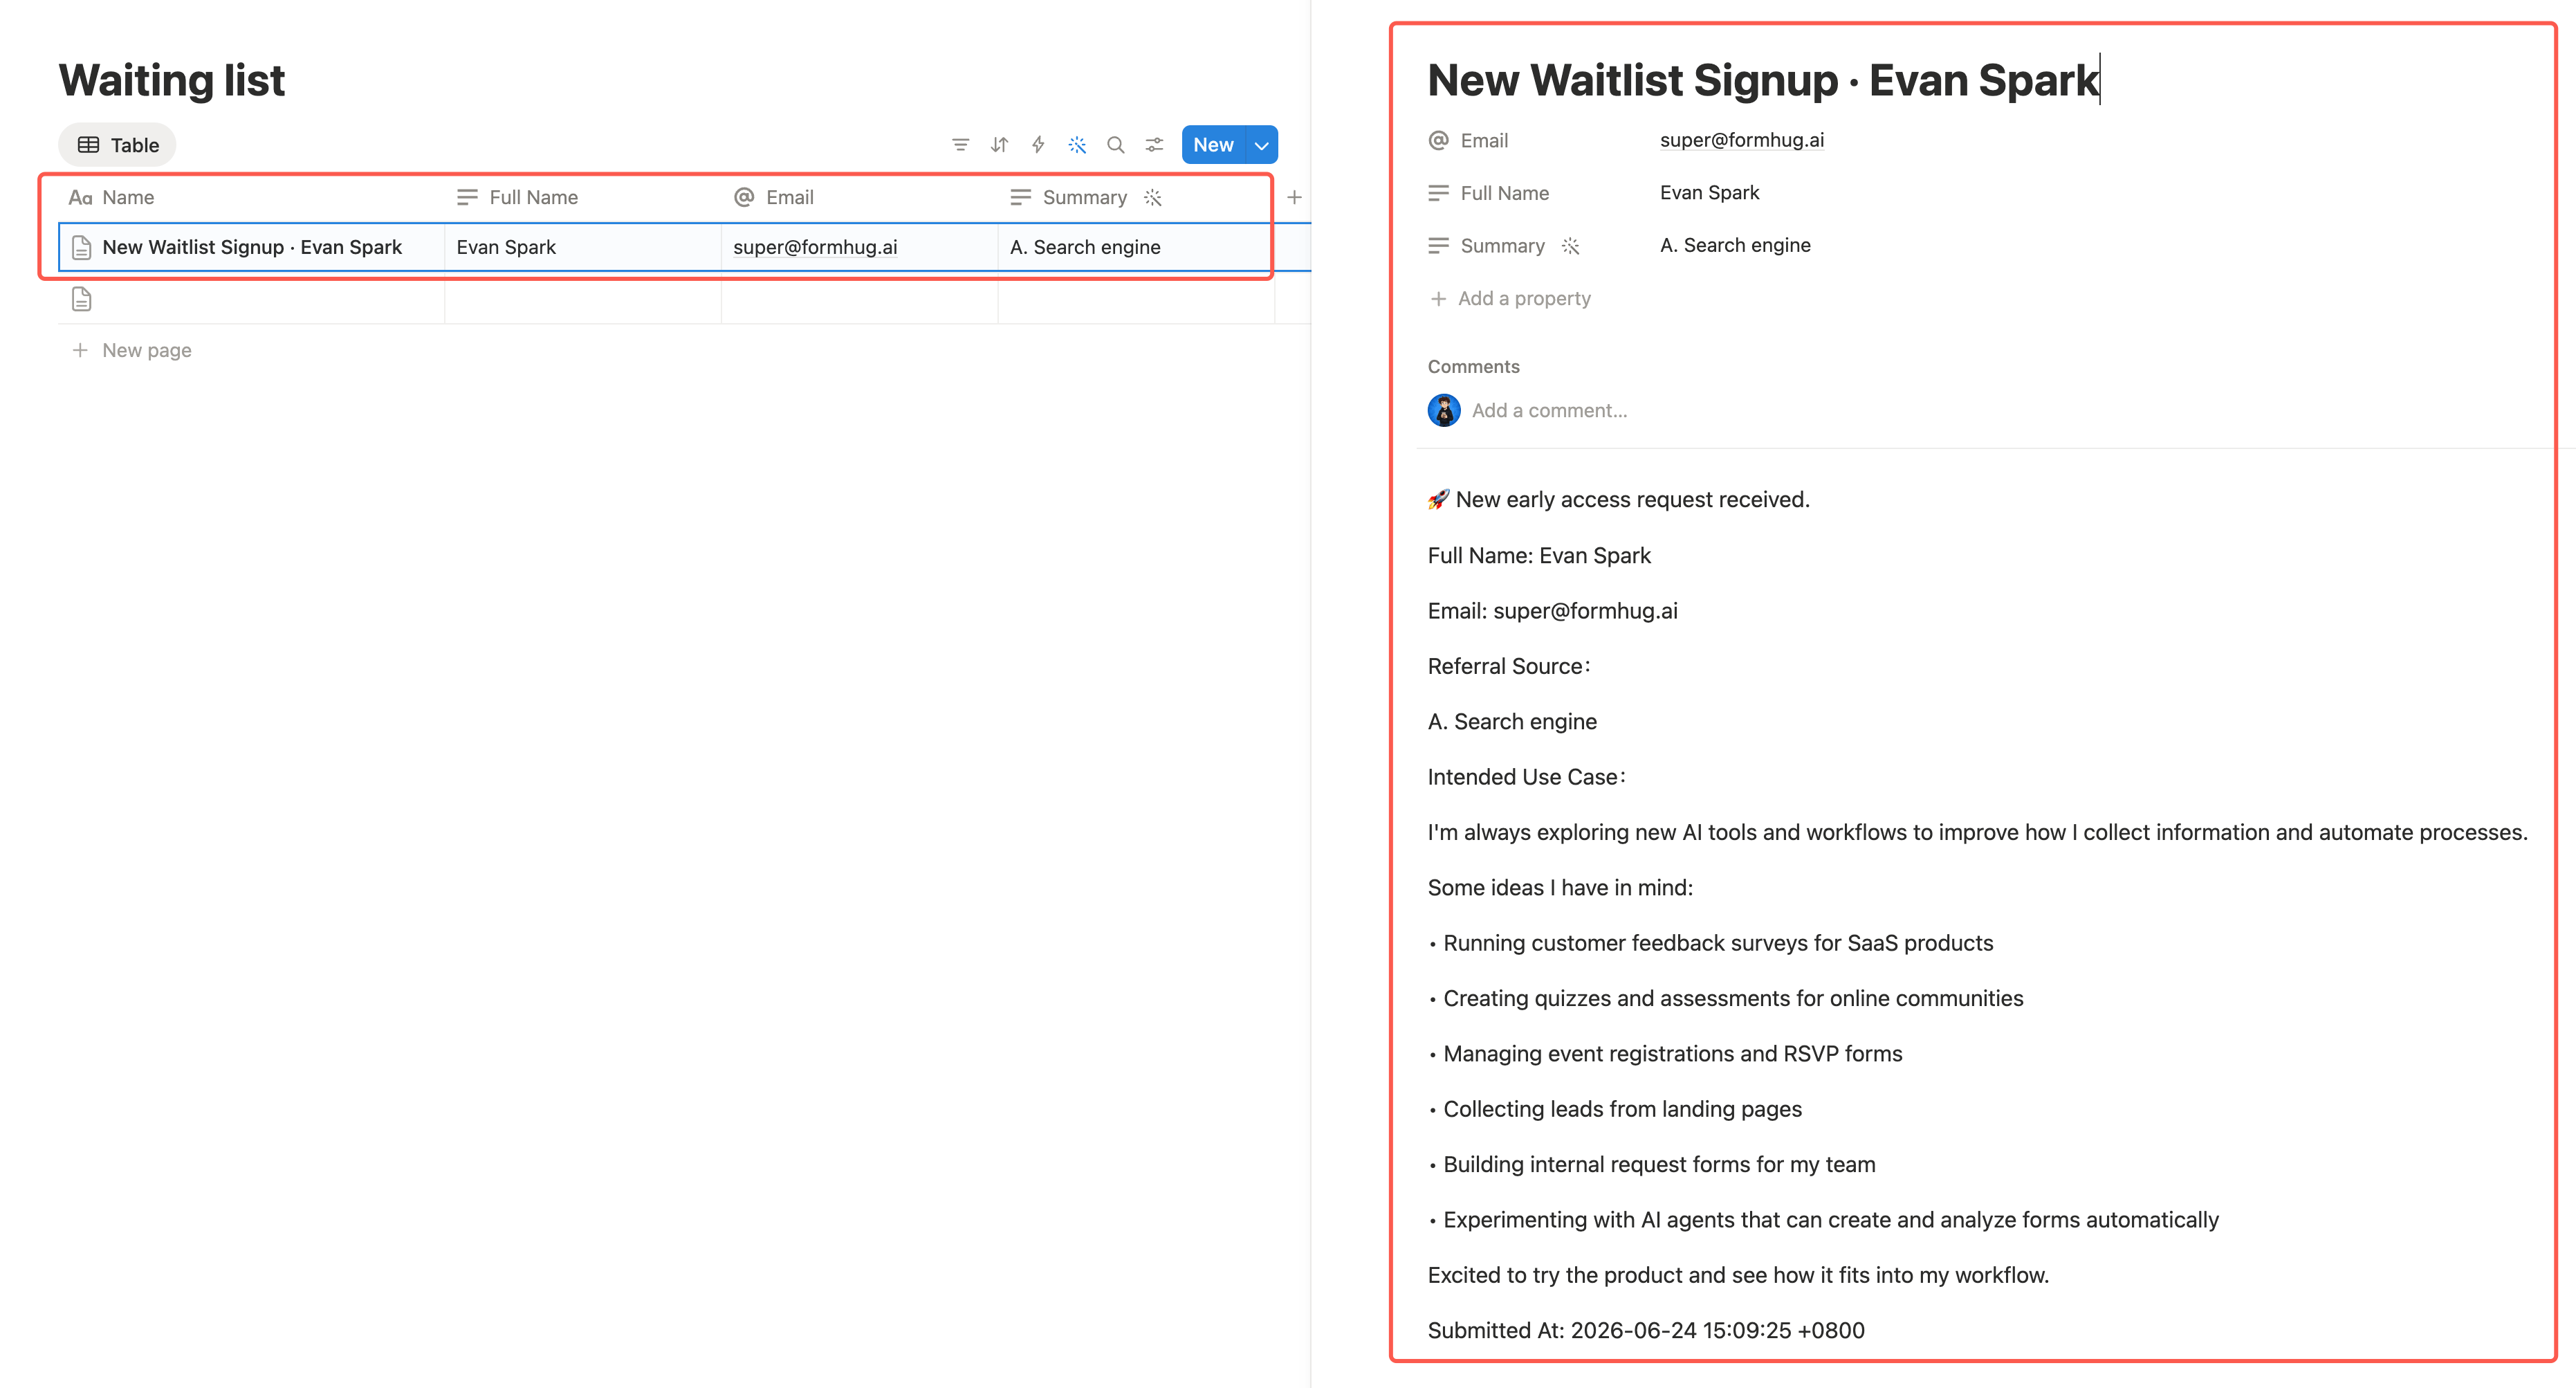 The database row stores the mapped properties. Opening the page shows the page content generated from your FormHug fields.
## Limitations
* The integration syncs new submissions after the connection is created.
* FormHug connects to an existing Notion database. It does not create a new Notion database.
* Changes made inside Notion do not update the original FormHug submission.
* If you rename or remove Notion database properties, review the field mapping in FormHug.
* If you move the database or change Notion permissions, you may need to re-authorize the Notion connection.
* Notion access is controlled by Notion. Workspace admins may restrict who can install or manage connections.
## Troubleshooting
| Issue | What to check |
| --------------------------------------- | --------------------------------------------------------------------------------------------------- |
| The database is not listed | Re-authorize Notion and select the database or a parent page that contains it |
| A field cannot be mapped | Check that the Notion property type is compatible with the FormHug field value |
| Submissions are not appearing | Check **My connections** to make sure the Notion connection is enabled, then open the event logs |
| Sync fails after database changes | Update the FormHug field mapping to match the current Notion database properties |
| A teammate cannot manage the connection | Check their Notion workspace permissions and whether your workspace restricts connection management |
For more detail about Notion page access and connection permissions, see Notion's guide to adding and managing connections.
## Related
Sync submissions to a spreadsheet automatically
Push submission data to your own HTTP endpoint
Post submission alerts to a channel or direct message
Automate workflows across CRM, email, and productivity apps
View and manage all entries in FormHug
Analyze form results with built-in charts and summaries
The database row stores the mapped properties. Opening the page shows the page content generated from your FormHug fields.
## Limitations
* The integration syncs new submissions after the connection is created.
* FormHug connects to an existing Notion database. It does not create a new Notion database.
* Changes made inside Notion do not update the original FormHug submission.
* If you rename or remove Notion database properties, review the field mapping in FormHug.
* If you move the database or change Notion permissions, you may need to re-authorize the Notion connection.
* Notion access is controlled by Notion. Workspace admins may restrict who can install or manage connections.
## Troubleshooting
| Issue | What to check |
| --------------------------------------- | --------------------------------------------------------------------------------------------------- |
| The database is not listed | Re-authorize Notion and select the database or a parent page that contains it |
| A field cannot be mapped | Check that the Notion property type is compatible with the FormHug field value |
| Submissions are not appearing | Check **My connections** to make sure the Notion connection is enabled, then open the event logs |
| Sync fails after database changes | Update the FormHug field mapping to match the current Notion database properties |
| A teammate cannot manage the connection | Check their Notion workspace permissions and whether your workspace restricts connection management |
For more detail about Notion page access and connection permissions, see Notion's guide to adding and managing connections.
## Related
Sync submissions to a spreadsheet automatically
Push submission data to your own HTTP endpoint
Post submission alerts to a channel or direct message
Automate workflows across CRM, email, and productivity apps
View and manage all entries in FormHug
Analyze form results with built-in charts and summaries