> ## Documentation Index
> Fetch the complete documentation index at: https://formhug.ai/docs/llms.txt
> Use this file to discover all available pages before exploring further.
# SMTP Mail Server Integration
> Connect your own SMTP mail server to send FormHug emails from a verified sender address
The **SMTP mail server integration** lets FormHug send emails through your own mail server. Use it when you want reminders, notifications, or manual submission emails to come from a sender address your organization controls.
You can add an SMTP sender from the email sender dropdown, or manage SMTP servers from System -> Third-party services -> SMTP Mail Server.
Email providers may enforce sending limits, authentication requirements, sender verification, and security checks. Check your email provider's SMTP documentation before connecting.
## When to Use SMTP
Use SMTP when you want FormHug emails to match your organization's sender identity.
* Send confirmation emails from a team or brand address
* Send manual follow-up emails from the submissions page
* Use a verified Google Workspace or business email sender
* Keep outbound form email aligned with your organization's domain
* Use your provider's SMTP settings instead of a built-in Google sender
## Before You Start
Make sure you have:
* A business or organization email address you can authenticate
* SMTP server settings from your email provider
* Permission to use the sender address
* The correct SMTP password or app password
* Access to FormHug workspace settings or the email sender dropdown
Do not use your normal Google account password for Gmail or Google Workspace SMTP. If your provider requires an app password, generate and use that app password instead.
## Add an SMTP Sender
You can add SMTP from two places.
### From Third-party Services
Open System -> Third-party services -> SMTP Mail Server. Existing SMTP senders appear in the SMTP Mail Server tab.
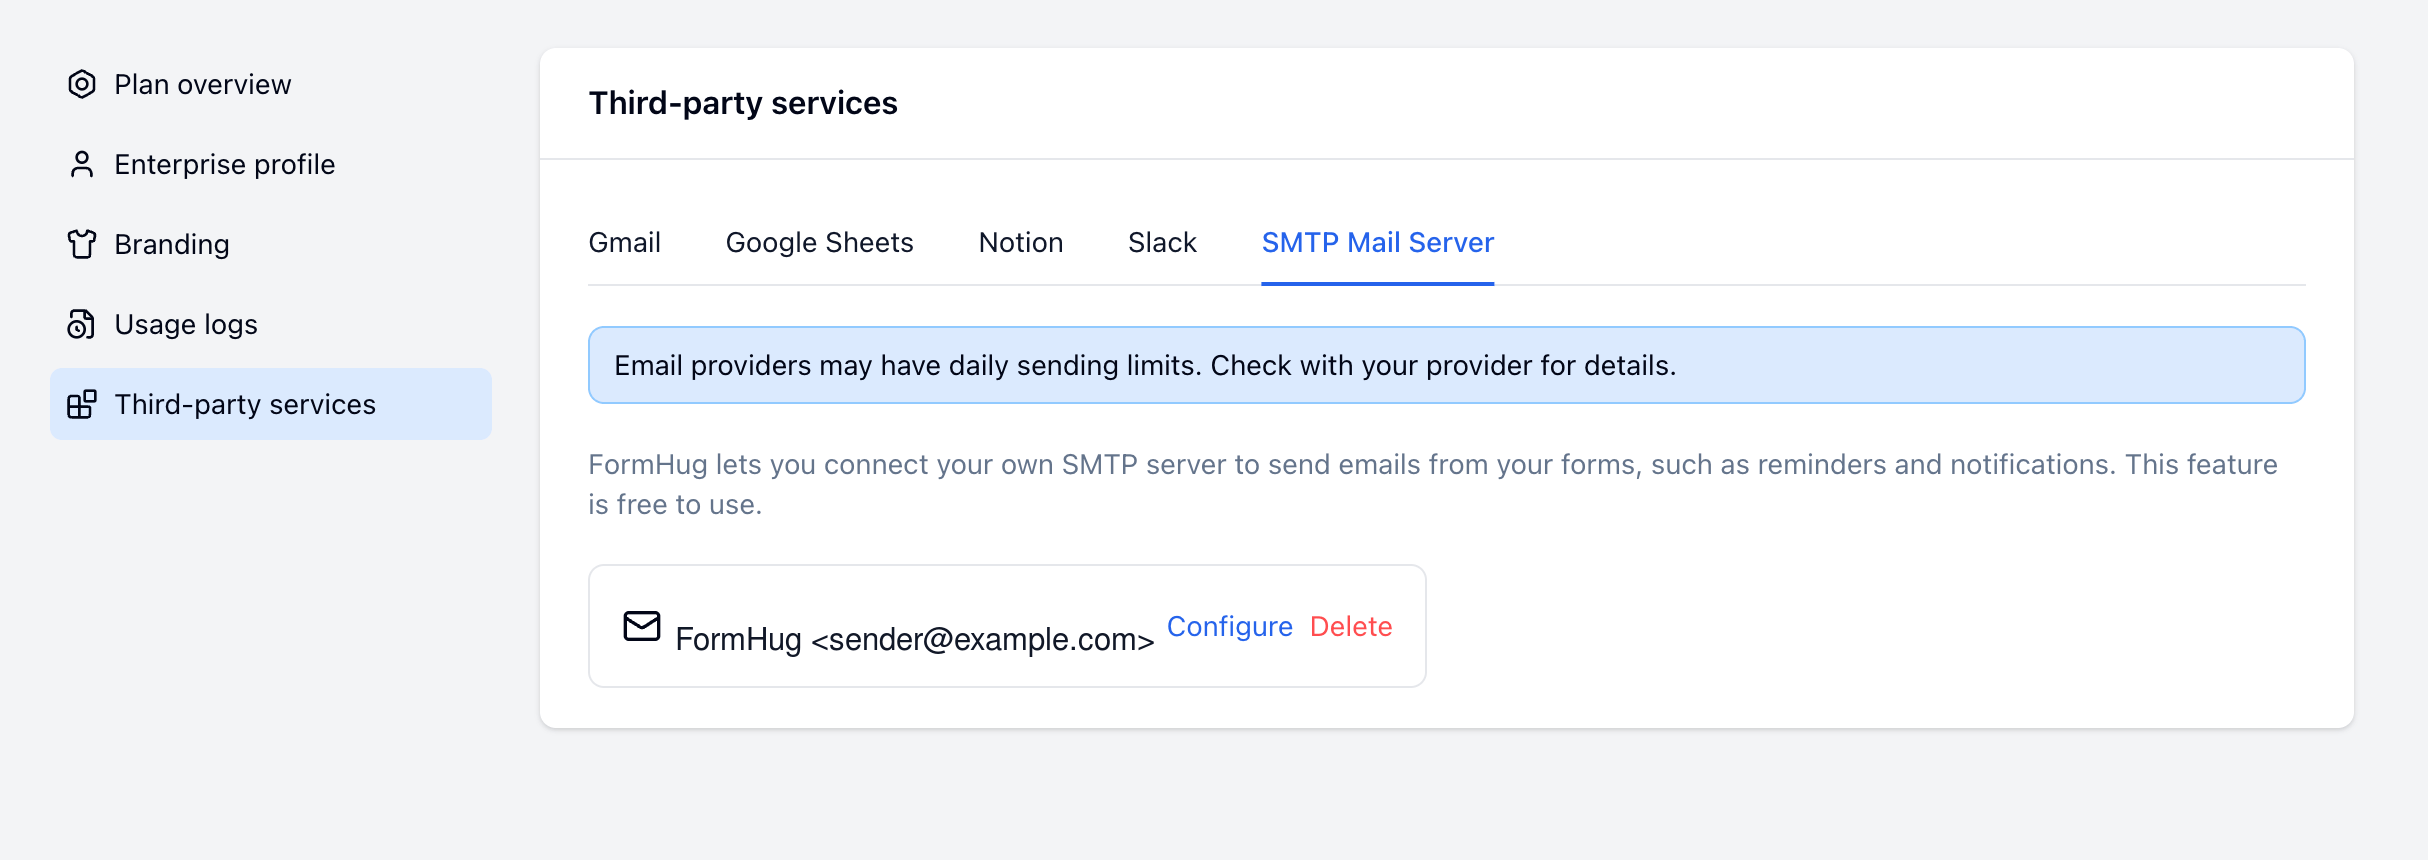 Click **Configure** to edit an existing SMTP sender, or add a new SMTP mail server if none is connected.
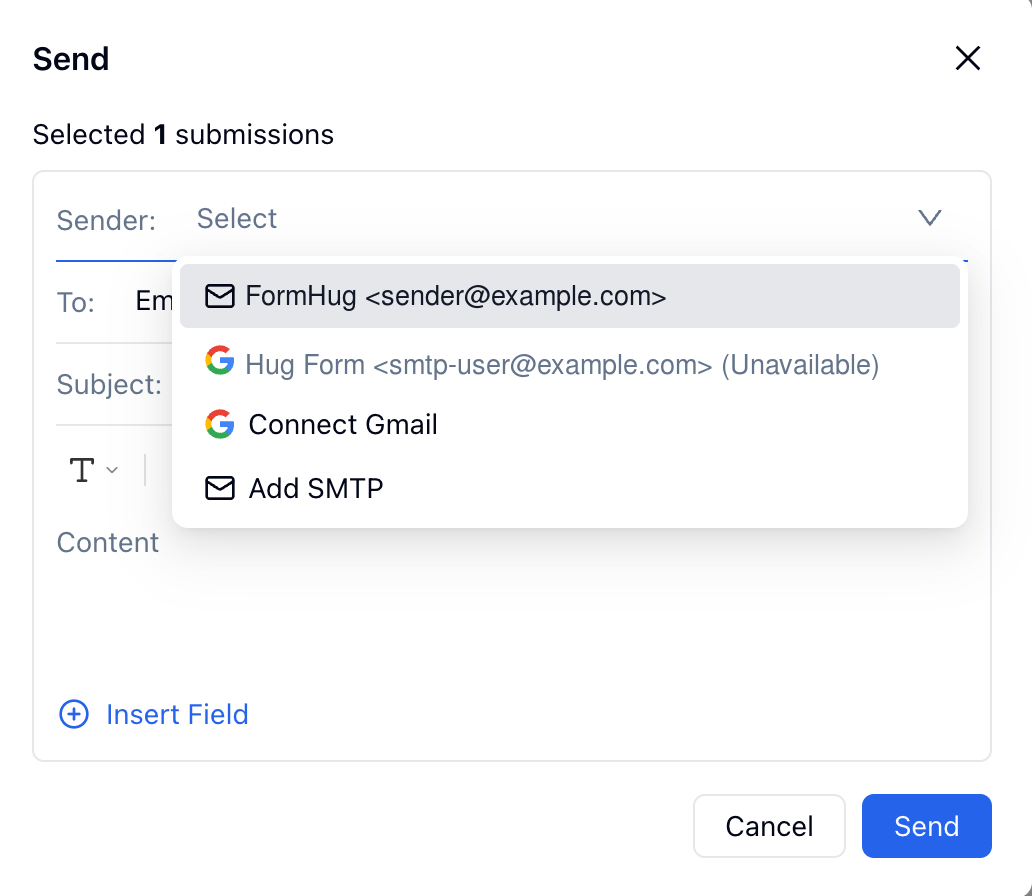
### From the Email Sender Dropdown
When composing an email from FormHug, open the **Sender** dropdown and choose **Add SMTP**.
Click **Configure** to edit an existing SMTP sender, or add a new SMTP mail server if none is connected.
### From the Email Sender Dropdown
When composing an email from FormHug, open the **Sender** dropdown and choose **Add SMTP**.
 This opens the same SMTP configuration flow.
## Configure the SMTP Server
Enter the sender details and SMTP server settings, then click **Save and test**.
This opens the same SMTP configuration flow.
## Configure the SMTP Server
Enter the sender details and SMTP server settings, then click **Save and test**.
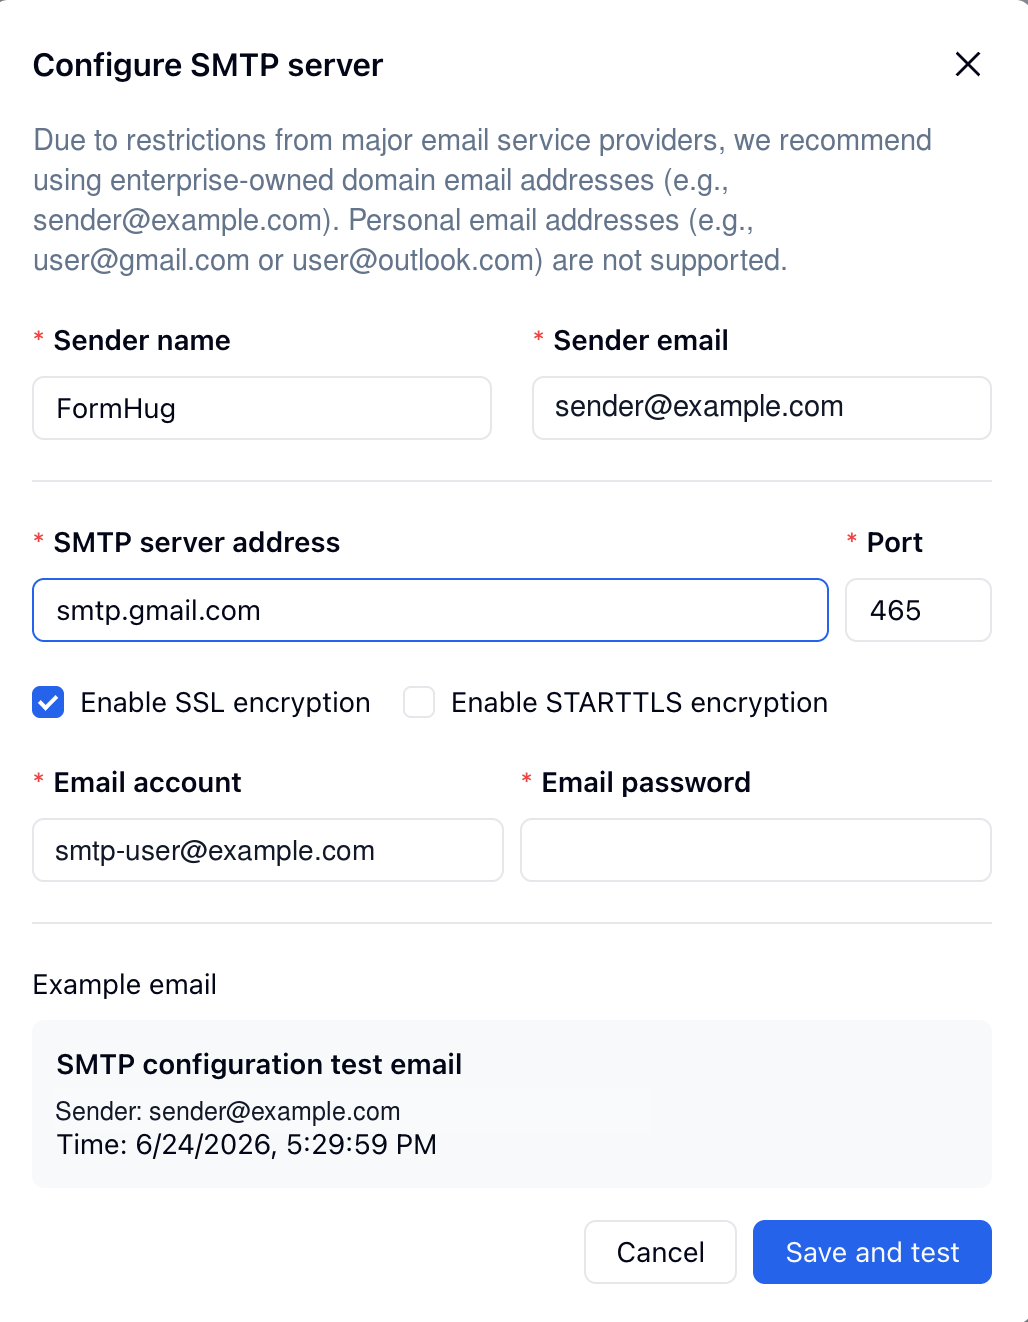 | Field | What to enter |
| ------------------- | ---------------------------------------------------------------------------- |
| Sender name | The display name recipients see, such as `FormHug` |
| Sender email | The email address shown in the From field, such as `sender@example.com` |
| SMTP server address | Your provider's SMTP host, such as `smtp.gmail.com` |
| Port | The SMTP port, such as `465` for SSL |
| SSL encryption | Enable when your provider requires SSL |
| STARTTLS encryption | Enable when your provider requires STARTTLS instead of SSL |
| Email account | The mailbox or account used to authenticate, such as `smtp-user@example.com` |
| Email password | The SMTP password or provider-generated app password |
After saving, FormHug sends a test email to confirm that the SMTP settings work.
## Gmail and Google Workspace Settings
If you use a Google Workspace email address, such as `hello@example.com`, use Gmail's SMTP settings:
| Setting | Value |
| -------------- | ----------------------------------- |
| SMTP server | `smtp.gmail.com` |
| Port | `465` |
| SSL encryption | Enabled |
| Email account | Your Google Workspace email address |
| Email password | Google App Password |
### Use an App Password
Google does not allow SMTP access with your normal account password for this kind of username/password connection.
Before connecting Gmail SMTP:
1. Enable 2-Step Verification for the Google account.
2. Generate an App Password from Google Account settings.
3. Use the generated App Password as the **Email password** in FormHug.
Do not enter your regular Google account password.
### Verify the Sender Address
When using Gmail SMTP, Google may send from the authenticated account if the sender address is not verified.
For best compatibility:
* Use the same address for **Sender email** and **Email account**, or
* Add and verify the sender address as a **Send mail as** alias in Gmail.
Example:
| Field | Example |
| ------------- | --------------------------- |
| Sender email | `notifications@example.com` |
| Email account | `smtp-user@example.com` |
Before using `notifications@example.com` as the sender, add and verify it in Gmail:
```text theme={null}
Gmail -> Settings -> Accounts and Import -> Send mail as
```
Otherwise, Gmail may replace the sender address with the authenticated account.
## Example Configuration
| Field | Example value |
| -------------- | ----------------------- |
| Sender name | `FormHug` |
| Sender email | `sender@example.com` |
| Email account | `smtp-user@example.com` |
| SMTP server | `smtp.gmail.com` |
| Port | `465` |
| SSL encryption | Enabled |
| Email password | Google App Password |
## Send an Email with the SMTP Sender
After the SMTP sender is connected, select it when composing an email from FormHug.
| Field | What to enter |
| ------------------- | ---------------------------------------------------------------------------- |
| Sender name | The display name recipients see, such as `FormHug` |
| Sender email | The email address shown in the From field, such as `sender@example.com` |
| SMTP server address | Your provider's SMTP host, such as `smtp.gmail.com` |
| Port | The SMTP port, such as `465` for SSL |
| SSL encryption | Enable when your provider requires SSL |
| STARTTLS encryption | Enable when your provider requires STARTTLS instead of SSL |
| Email account | The mailbox or account used to authenticate, such as `smtp-user@example.com` |
| Email password | The SMTP password or provider-generated app password |
After saving, FormHug sends a test email to confirm that the SMTP settings work.
## Gmail and Google Workspace Settings
If you use a Google Workspace email address, such as `hello@example.com`, use Gmail's SMTP settings:
| Setting | Value |
| -------------- | ----------------------------------- |
| SMTP server | `smtp.gmail.com` |
| Port | `465` |
| SSL encryption | Enabled |
| Email account | Your Google Workspace email address |
| Email password | Google App Password |
### Use an App Password
Google does not allow SMTP access with your normal account password for this kind of username/password connection.
Before connecting Gmail SMTP:
1. Enable 2-Step Verification for the Google account.
2. Generate an App Password from Google Account settings.
3. Use the generated App Password as the **Email password** in FormHug.
Do not enter your regular Google account password.
### Verify the Sender Address
When using Gmail SMTP, Google may send from the authenticated account if the sender address is not verified.
For best compatibility:
* Use the same address for **Sender email** and **Email account**, or
* Add and verify the sender address as a **Send mail as** alias in Gmail.
Example:
| Field | Example |
| ------------- | --------------------------- |
| Sender email | `notifications@example.com` |
| Email account | `smtp-user@example.com` |
Before using `notifications@example.com` as the sender, add and verify it in Gmail:
```text theme={null}
Gmail -> Settings -> Accounts and Import -> Send mail as
```
Otherwise, Gmail may replace the sender address with the authenticated account.
## Example Configuration
| Field | Example value |
| -------------- | ----------------------- |
| Sender name | `FormHug` |
| Sender email | `sender@example.com` |
| Email account | `smtp-user@example.com` |
| SMTP server | `smtp.gmail.com` |
| Port | `465` |
| SSL encryption | Enabled |
| Email password | Google App Password |
## Send an Email with the SMTP Sender
After the SMTP sender is connected, select it when composing an email from FormHug.
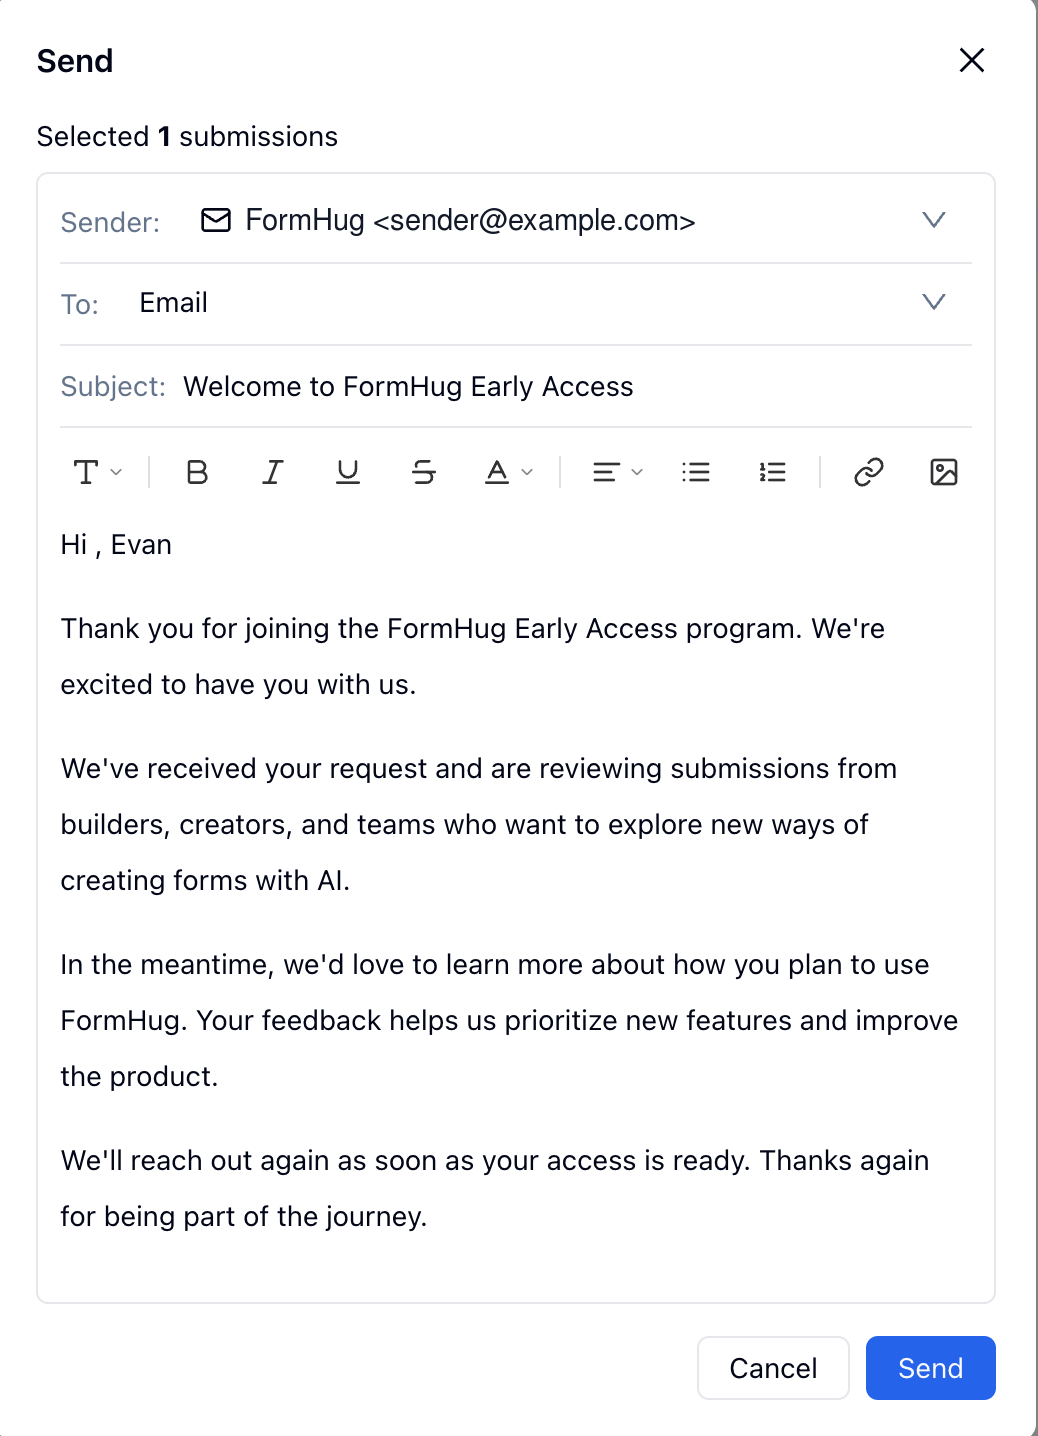 Fill in the recipient field, subject, and content, then send the email.
## Check the Received Email
Open the recipient inbox and confirm that the email arrived from the expected sender.
Fill in the recipient field, subject, and content, then send the email.
## Check the Received Email
Open the recipient inbox and confirm that the email arrived from the expected sender.
 If the message appears from a different sender address, review your provider's sender verification or alias settings.
## Limitations
* SMTP send volume is controlled by your email provider's sending limits.
* FormHug cannot bypass provider authentication, app password, or sender verification rules.
* Personal mainstream email addresses may not be supported for custom SMTP sending in FormHug.
* If your provider changes SMTP settings or revokes an app password, reconnect or update the SMTP sender.
* If the sender address is not verified with your provider, the provider may override it.
## Troubleshooting
| Issue | What to check |
| -------------------------------- | ----------------------------------------------------------------------------------------------- |
| Test email fails | Confirm SMTP server, port, encryption mode, account, and password |
| Gmail says password is incorrect | Use a Google App Password instead of your normal Google password |
| Sender address is replaced | Use the same sender and account address, or verify the sender as a Gmail **Send mail as** alias |
| SMTP sender is unavailable | Check whether the sender was deleted, disabled, or failed its latest test |
| Emails are delayed or rejected | Check provider sending limits, spam policies, and authentication settings |
For Gmail and Google Workspace, see Google's help pages for app passwords, Send mail as aliases, and using Gmail with another email client.
## Related
Send confirmation emails and reminders from a connected Gmail account
Configure built-in form notification settings
View submissions and send manual follow-up emails
Choose the right integration for your workflow
If the message appears from a different sender address, review your provider's sender verification or alias settings.
## Limitations
* SMTP send volume is controlled by your email provider's sending limits.
* FormHug cannot bypass provider authentication, app password, or sender verification rules.
* Personal mainstream email addresses may not be supported for custom SMTP sending in FormHug.
* If your provider changes SMTP settings or revokes an app password, reconnect or update the SMTP sender.
* If the sender address is not verified with your provider, the provider may override it.
## Troubleshooting
| Issue | What to check |
| -------------------------------- | ----------------------------------------------------------------------------------------------- |
| Test email fails | Confirm SMTP server, port, encryption mode, account, and password |
| Gmail says password is incorrect | Use a Google App Password instead of your normal Google password |
| Sender address is replaced | Use the same sender and account address, or verify the sender as a Gmail **Send mail as** alias |
| SMTP sender is unavailable | Check whether the sender was deleted, disabled, or failed its latest test |
| Emails are delayed or rejected | Check provider sending limits, spam policies, and authentication settings |
For Gmail and Google Workspace, see Google's help pages for app passwords, Send mail as aliases, and using Gmail with another email client.
## Related
Send confirmation emails and reminders from a connected Gmail account
Configure built-in form notification settings
View submissions and send manual follow-up emails
Choose the right integration for your workflow