How to Create an Online Form: A Practical Guide for Beginners
Start from a template
Use a ready-made form structure
Pick a registration, booking, intake, application, or order template and customize it for your workflow.
The problem with collecting answers by email is what happens after the replies arrive. One person omits the date, another sends a phone number in a follow-up, and a third answers questions you never asked. Before doing the work, you have to reconstruct the request.
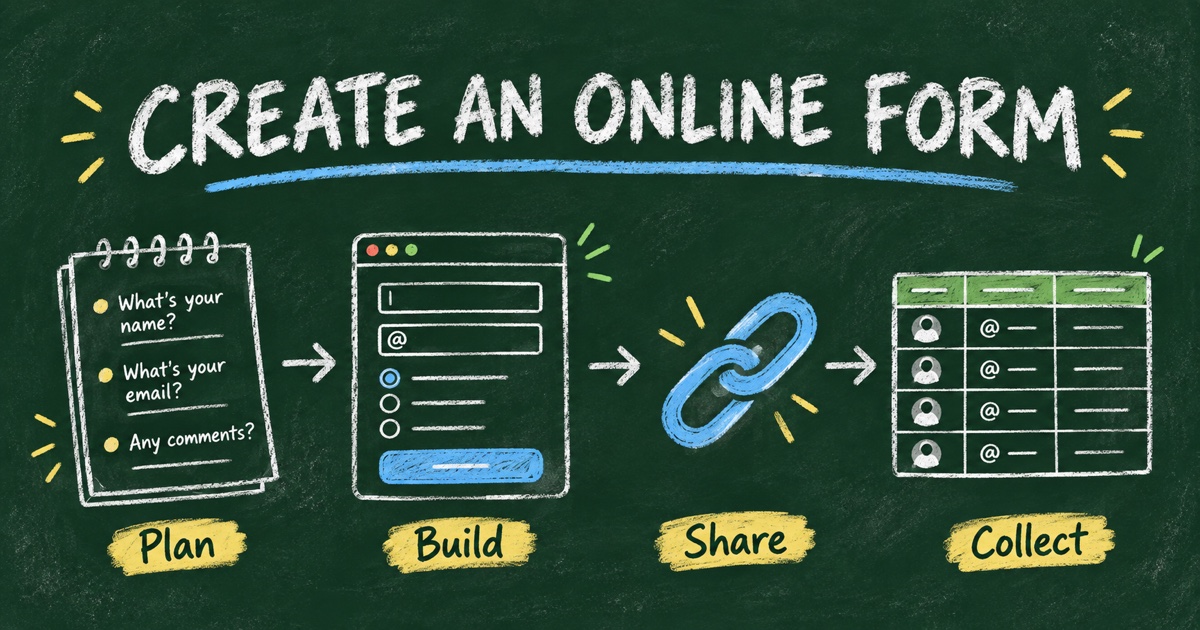
To create an online form, choose the information needed for one task, turn it into clear fields, test the complete submission experience, and share a public link or embed. The result should be a consistent set of responses you can use, not simply a nicer-looking questionnaire.
This beginner’s guide uses a small workshop signup as an example. The same process works for inquiries, applications, feedback, and internal requests, with different fields and next steps.
TL;DR — An online form is a web page that collects answers into structured submissions for review or a follow-up workflow.
- Start with the action the answers will support.
- Choose field types that match the information: email, date, number, choice, or text.
- Require only what is needed to begin the task.
- Test the public link, confirmation, and saved response before sharing.
- Decide who will review submissions and what happens next.
What Do You Need to Create an Online Form?
You need a form builder, a clear purpose, a small set of questions, and somewhere to review responses. A separate website is optional when the builder hosts the public form. Embedding is useful if you want people to complete it inside an existing page.
The important distinction is between a fillable document and a structured online form. A document may collect text in a file; a hosted form can collect separate fields into a response table. Choose based on how you need to use the answers, not just how the blank version looks.
For the workshop example, the purpose is: “Collect the information needed to confirm someone’s interest in a workshop session and contact them about the next step.” If capacity is not yet confirmed, the form should say it is a request, not a guaranteed booking.
Plan the Questions Before Choosing a Design
Write a sentence describing what will happen after submission. Then list the facts needed to carry it out. A first version might need only these fields:
| Question | Field type | Required? | Reason |
|---|---|---|---|
| What name should we use? | Short text or name | Yes | Recognize the request |
| Where should we email you? | Yes | Send the next-step message | |
| Which session are you interested in? | Single choice | Yes | Group requests by session |
| How many places are you requesting? | Number | If group requests are allowed | Plan the number of participants |
| Is there anything we should know to help you participate? | Long text | No | Let people volunteer relevant context |
Do not add a full postal address, date of birth, or employer simply because the builder has those fields. If a field does not affect the task, explain why you need it or remove it.
Separate one idea into one question. “Which session and meal would you like?” should become separate fields if both answers are necessary. A short question is not necessarily a clear question when it asks for two unrelated things.
For more specialized collection, our registration questions guide and application form guide show how the purpose changes the field list.
Choose Field Types That Make Answers Usable
Use a choice field when the possible answers are known and you want to count or group them. Use text when people need to explain something in their own words. Use a date or number field when that data type matters to the next step.
A date written as “next Friday” may be understandable today and ambiguous later. A proper date field makes the intended date explicit. An email field can catch basic formatting issues, though it cannot guarantee the address belongs to the respondent or that a message will be delivered.
Make required fields deliberate. Required means people cannot complete the form without answering. That is appropriate for the session choice in a signup request, but can pressure people into inventing a comment when you require an open-ended answer they do not have.
If a question applies only to some people, use an appropriate condition or a clear optional instruction. Our conditional logic guide explains how to avoid showing everyone every follow-up.
Choose a Starting Point for Your Online Form
| Starting point | Best fit | What to review |
|---|---|---|
| Template | A familiar task such as registration or feedback | Remove fields that do not match your situation |
| AI-generated draft | You can describe the task and constraints clearly | Check questions, field types, and invented assumptions |
| Blank form | You already have a small, defined field list | Add only the structure the task needs |
FormHug supports these starting points, documented in Create Your First Form. A template can be the quickest way to see a sensible structure; a blank form can be simplest when you need only a handful of fields.
Useful starting examples include a Training Registration Form, a Project Intake Form, or an Event Feedback Form. Use the one closest to the task, not whichever has the most fields.
If you are still comparing builders, check the workflow you need: appropriate fields, an understandable mobile form, a shareable link, usable submission records, and the notifications or integrations your task requires. Plan limits and availability can change, so verify those details before building around them.
How to Create an Online Form in Four Steps
Step 1: Build the smallest useful version
Choose a starting point and add your field list. Give the form a specific title such as “Saturday Workshop Interest Form” rather than “New Form.” Add a short introduction explaining who should fill it out and what submission means.
If you use AI, a suitable prompt is:
Create a workshop interest form with name, email, session choice, number of requested places, and an optional participation note. Session options are morning and afternoon. Explain that this records interest and that a place is confirmed only after a separate confirmation. Do not collect payment or unnecessary personal details.
Review every question after generation. The form should not invent a price, venue, date, or promise. These details belong in your brief if you want the builder to include them.
Step 2: Make instructions and the end page clear
Use visible labels rather than relying on placeholder text that disappears as someone types. Put any format instruction next to the field that needs it. Keep the introduction shorter than the task itself.
Write a confirmation that matches the actual workflow. “We received your request” is different from “Your place is confirmed.” If you will send an email, configure and test that separately; a message shown on the end page does not mean an email was sent.
Step 3: Test the public form and the saved answer
Open the public link as a respondent, preferably on a phone as well as a desktop. Submit a fictional response, then check that it appears where you will review entries.
Try these cases before sharing:
- Leave an optional answer blank.
- Enter a long but reasonable response.
- Omit a required answer and check the validation message.
- Choose each session or other branch.
- Confirm the end page says what you intend.
- Check any confirmation email or integration separately.
If the form requests login or has a submission limit, test under those conditions too. A successful preview while signed in is not enough to prove that a new visitor can submit.
Step 4: Share where the task begins
Use a direct link in an invitation or message. Use a QR code for a physical venue or printed material. Embed the form when someone should complete it on an existing page. FormHug’s sharing documentation explains the distribution options.
Place the link next to a clear reason to act: “Request your workshop session” or “Send your project brief.” The context should explain what the form is for before people open it.
Organize Responses Before They Arrive
A working form needs a reviewer. Decide who checks new submissions, what counts as complete, and how requests move to the next step. For a small workshop, that might be a daily review of session interest followed by a separate place confirmation.
FormHug’s submission page provides a table for reviewing entries and exporting data. If the team manages the work in another system, plan that handoff explicitly. Our intake form with a database guide covers one such workflow.
Keep the respondent’s answers separate from your internal decision. A submitted session preference is not the same field as “confirmed attendee.” That distinction prevents a convenient collection tool from creating an accidental promise.
Frequently Asked Questions
How do I create an online form?
Choose a form builder, define the task, add the necessary fields, write clear instructions, and test a real submission. Then share the hosted link or embed the form where people will use it.
Can I create an online form without a website?
Yes. A hosted form builder can provide a public URL that respondents open directly. You need a separate website only if you want to embed the form or place it within a broader site experience.
What fields should my first online form include?
Include only the information needed for the next action. A signup request may need name, email, and a session choice; a feedback form may not need identity at all. The field list follows the task.
Can I create an online form for free?
Many builders offer a free starting option, but limits and included features vary. Check the current plan against your required field types, response volume, sharing method, and follow-up workflow before relying on it.
How do I know whether my form works on mobile?
Open the public URL on a phone and complete the task. Check labels, keyboard behavior, choice lengths, error messages, and the confirmation. Also confirm that the submission is saved correctly.
Can I create an online form with FormHug?
Yes. Start with a template, an AI-generated draft, or a blank form, edit the fields and settings, and test the public link. Use the current product documentation for any specialized requirement before sharing it with respondents.
Related
- Best Form Templates for Teams and Businesses — find a starting structure for common tasks.
- How to Use Conditional Logic in Forms — show follow-up questions only when relevant.
- How to Send Confirmation and Reminder Emails — plan the communication after submission.
Stop reconstructing requests from scattered email replies. Collect the few answers you need in one consistent place, then create your form →.

Written by
FormHug TeamProduct, research, and form automation team
The FormHug Team brings together product builders, workflow researchers, and form automation practitioners who study how people collect, route, and act on information online. Our guides are based on hands-on product testing, template analysis, customer workflow patterns, and deep experience with forms, surveys, quizzes, AI-assisted creation, integrations, and results sharing.